

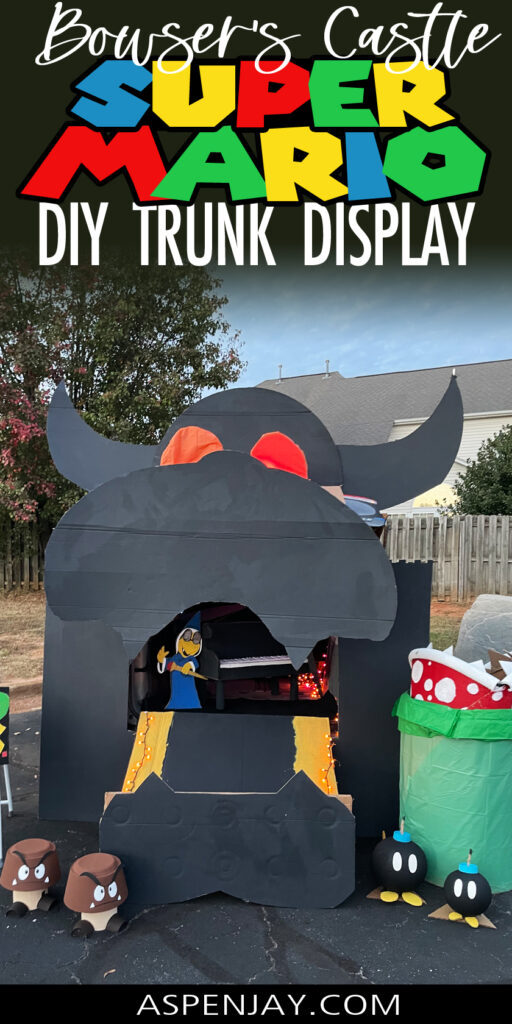
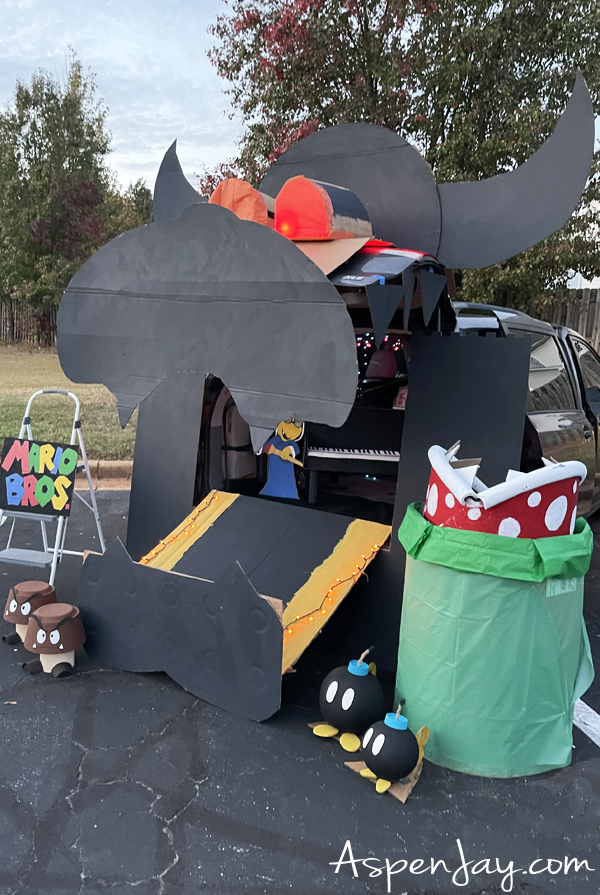
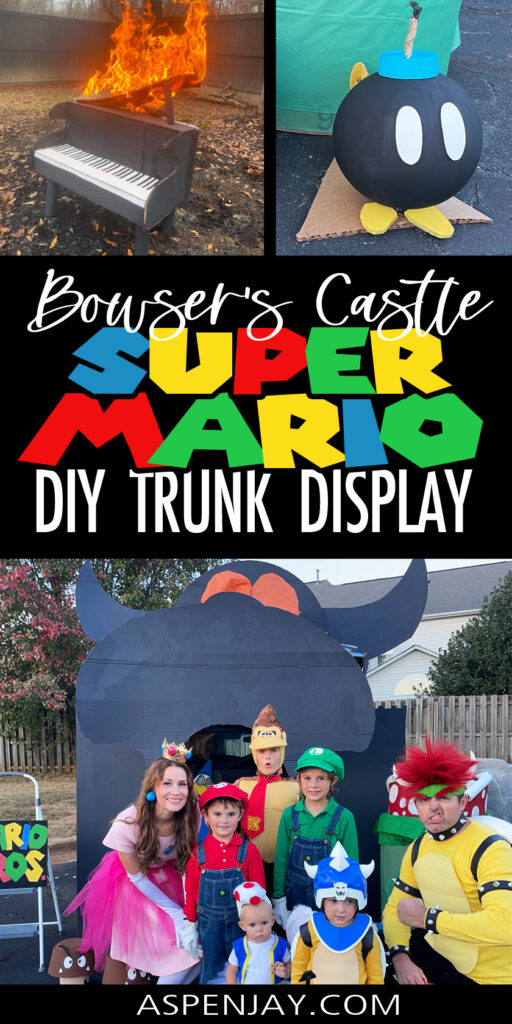
Our family went all out with our Super Mario themed Trunk-or-Treat, by transforming our trunk into Bowser’s Castle. Complete with a DIY cardboard piano, glowing lights, and our matching Super Mario family costumes, it brought the Mario movie to life! In this post, I’ll share how we built it and give tips to inspire your own epic Super Mario trunk.
Post contains affiliate links at no extra cost to you.
This year’s trunk for our church’s Trunk-or-Treat was pretty epic, if I do say so myself! It’s definitely one of the most fun ones we’ve ever created! Since our family costumes were Super Mario Bros. themed, we knew our trunk had to match. I was already busy crafting costumes (including Bowser and Koopa shells from scratch!), so I left the actual trunk construction to my husband.
And he absolutely did not disappoint!
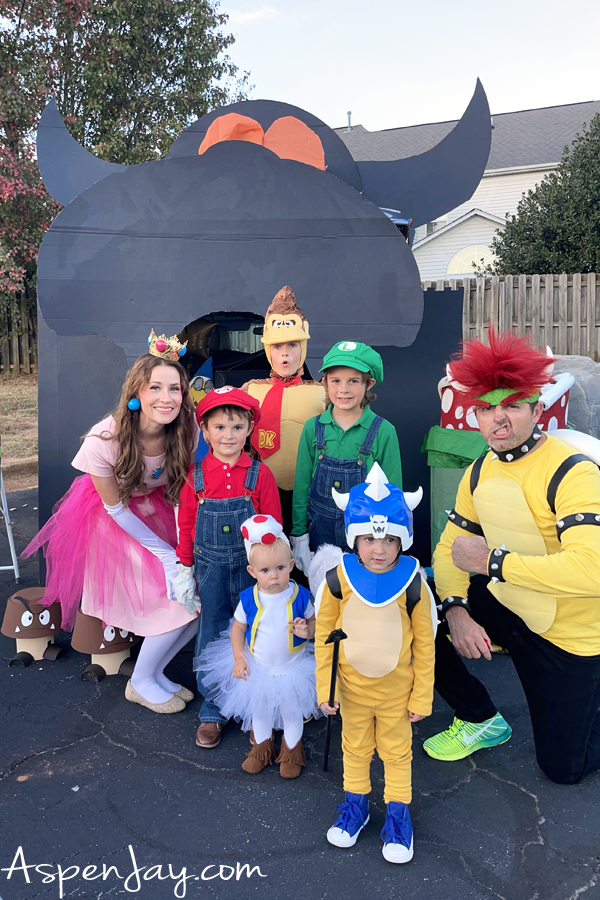
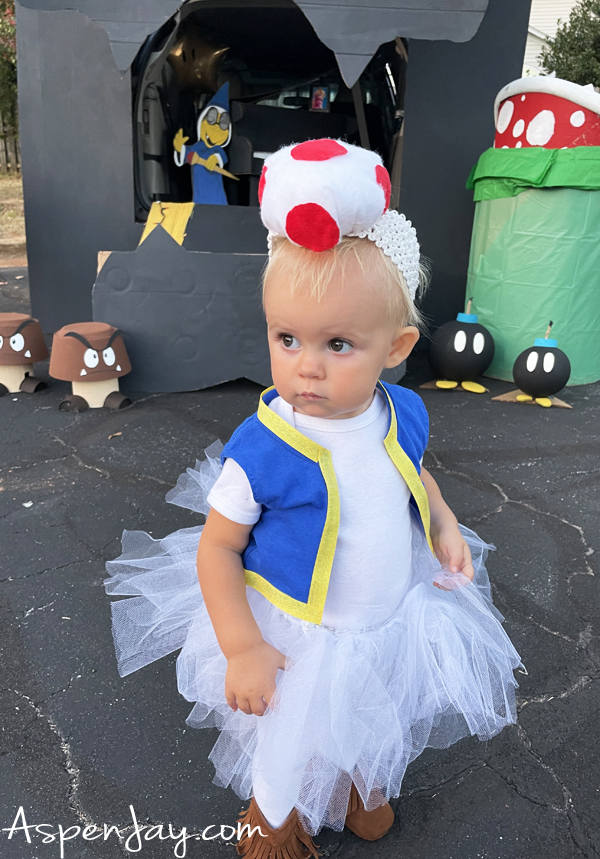
The costumes really brought the trunk to life—see our Super Mario family costumes here.
With nothing more than cardboard, paint, and a lot of creativity, he cut out and built the Bowser face façade castle. He wanted to create the illusion of entering into Bowser’s dark moody castle.
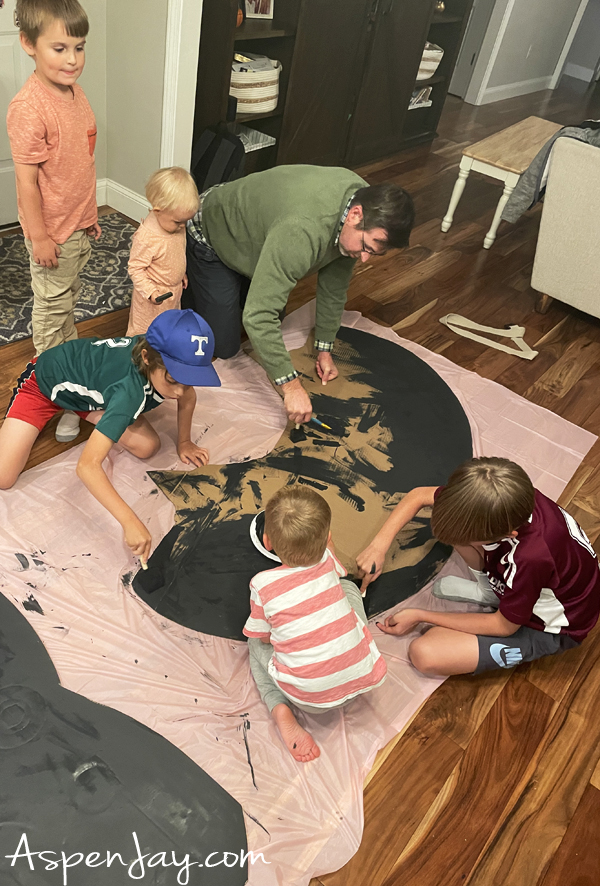
All the children volunteered to help in the painting so it turned into a true family project! Honestly, we’ve kind of made it a tradition to go all out decorating our trunk for our church’s Trunk-or-Treat each year and the kids love it!
Super Mario Trunk Scene Selection
“Not sure if you know who I am, but I’m about to marry a princess and rule the world.” – Bowser
The Super Mario Bros. movie did an amazing job with Bowser’s character. Even though he’s technically the bad guy, you can’t help but root for him—he’s the underdog, hilariously lovesick, and doing his best (in all the wrong ways) to win Princess Peach’s heart. And who could forget his catchy love song, “Peaches, Peaches, Peaches, Peaches, Peaches?” It was actually my children—even my one-year-old at the time—singing that song over and over (and over!) again that inspired me to choose a Super Mario theme for our family costumes.
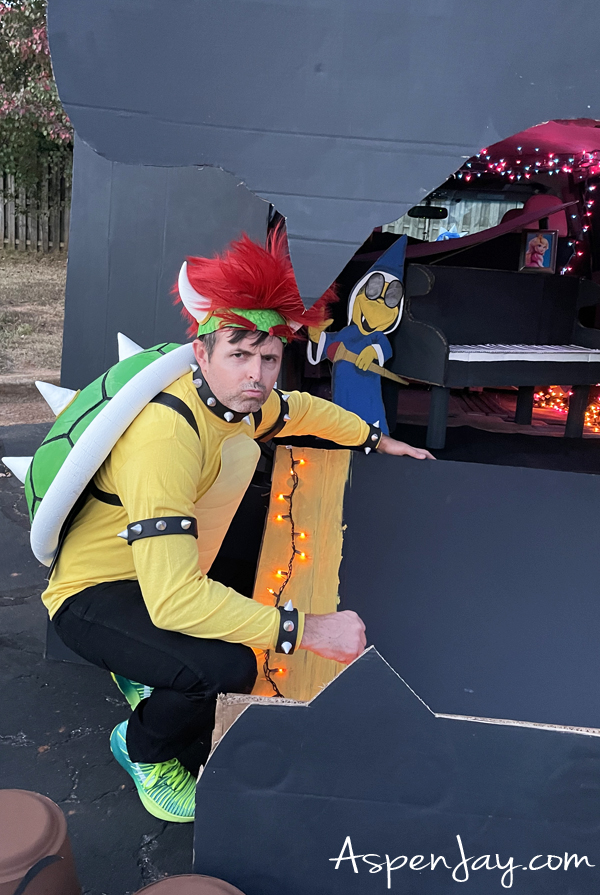
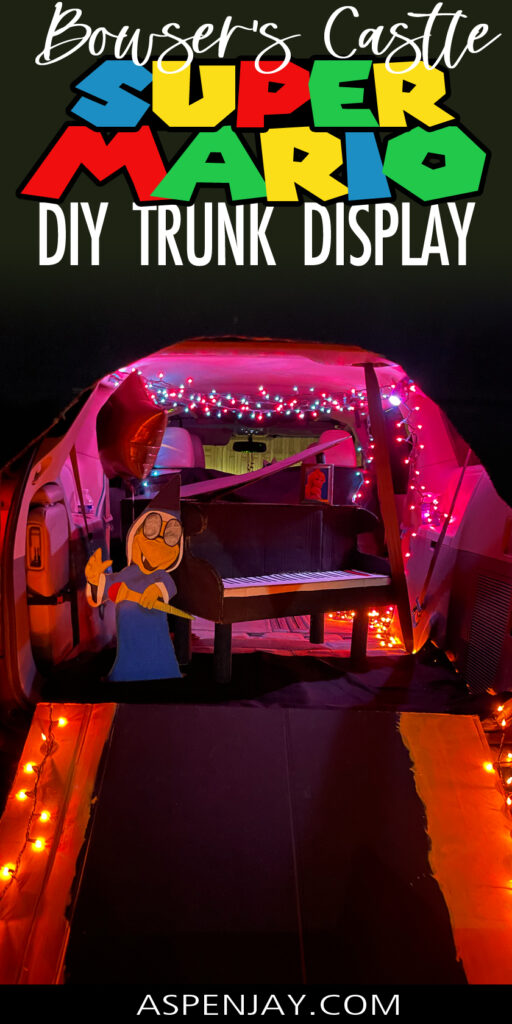
And when it came time to pick a scene for our trunk, Bowser’s lair was the obvious choice. After all, what scene could better justify having “Peaches, Peaches, Peaches” on repeat than that one?! That infamous song had to be included. So we recreated the unforgettable scene from the Super Mario Bros. movie where Bowser sits down to perform his original love ballad for Princess Peach.
Building the Trunk
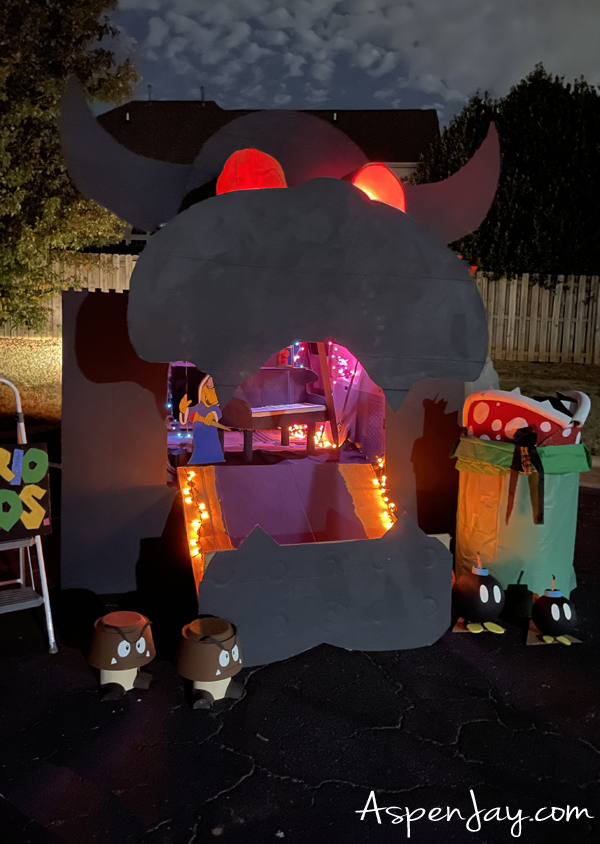
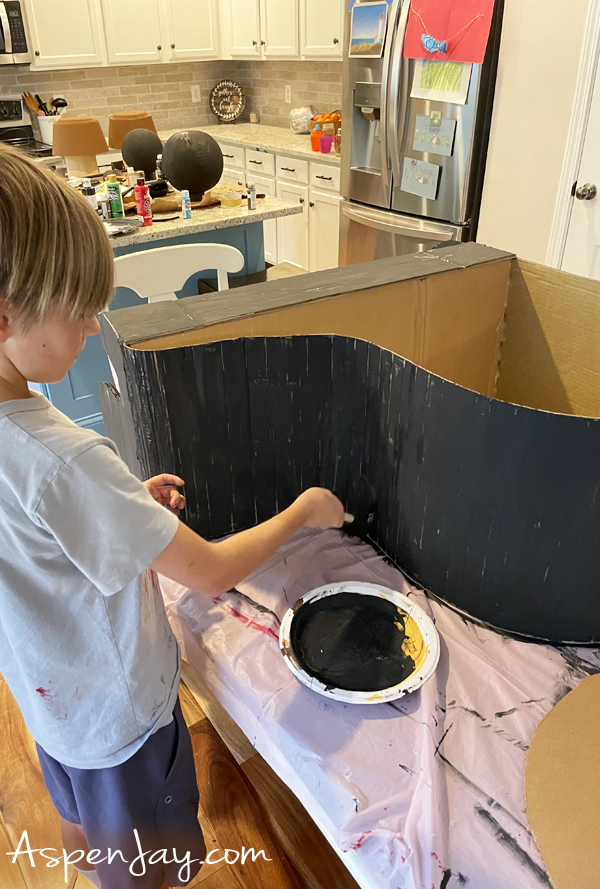
My husband built the large face of Bowser’s Castle, complete with two looming eyes made from cardboard. We painted them black, covered them with orange crepe paper, and placed a spotlight inside so they glowed ominously once the sun went down. You can see from the sideview of the trunk that we rested the carboard on the inside of our back trunk lid. To finish it off, we added a mini ramp leading up into the castle, lined with lights to guide the way.
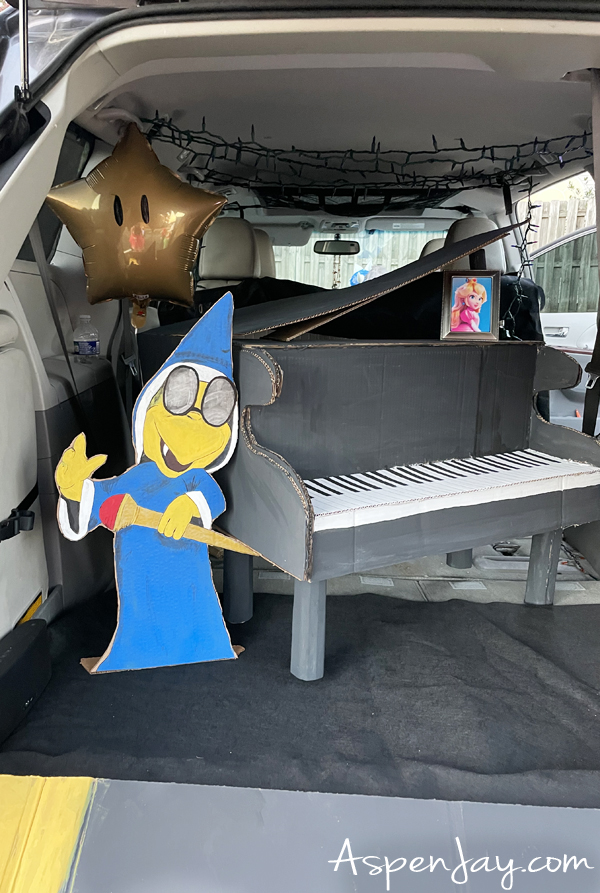
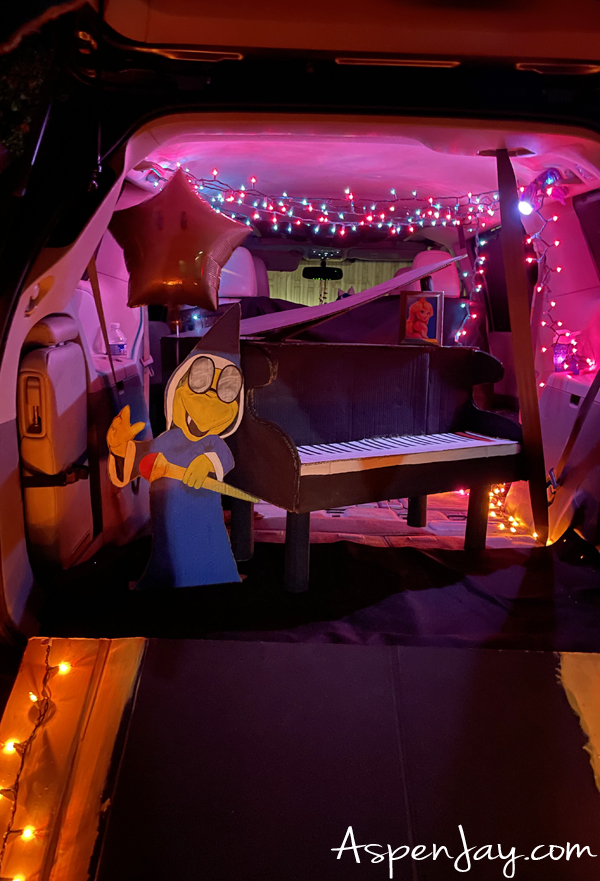
Now for the inside! Originally, this was all my husband was planning to do (and that was a lot!) but the inside of Bowers’ castle just wouldn’t be complete without a baby grand piano! Right?!
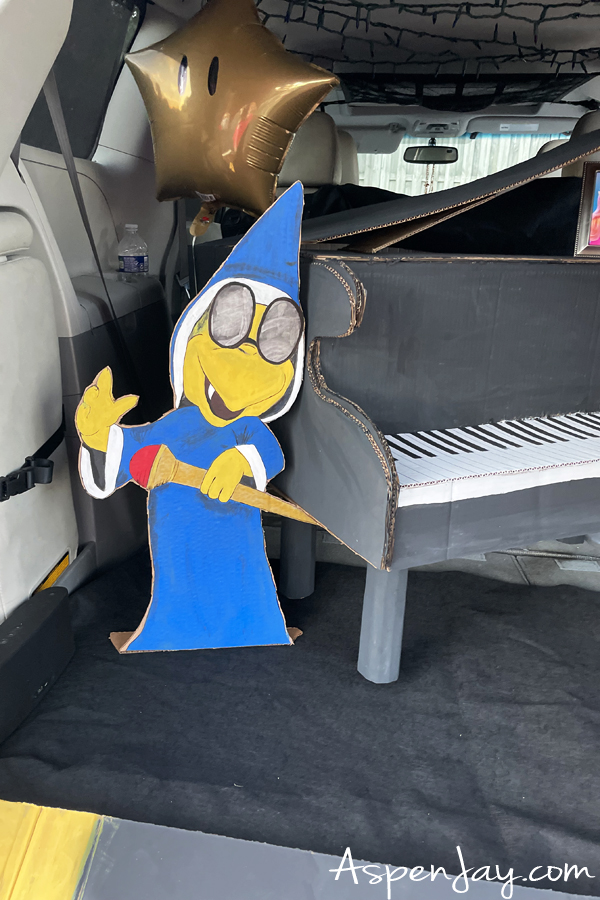
My husband thought I was joking when I said we needed a piano for the inside. Being the good sport that he is, when he learned that I was indeed serious, he went to searching on youtube how to create one! Not exactly a simple undertaking, let me tell you. To complete the scene, we added a framed picture of Princess Peach, our very own Super Star (a gold helium balloon with eyes I drew on with a sharpie), and I even made sure Bowser’s sidekick Kamek had a place in the setup. To finish it off, we strung pink and purple lights across the van ceiling to recreate the colorful moody glow from the movie scene.
Recreate the look:


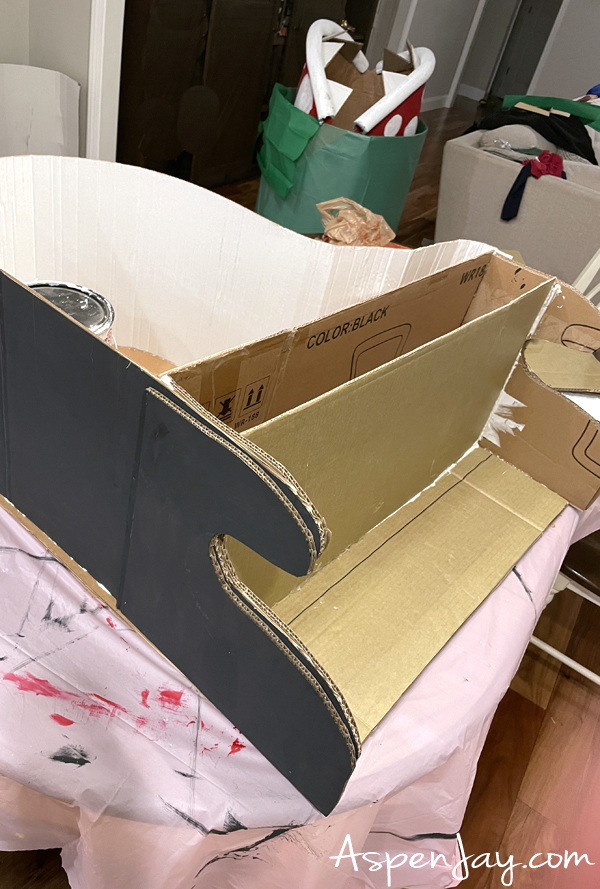
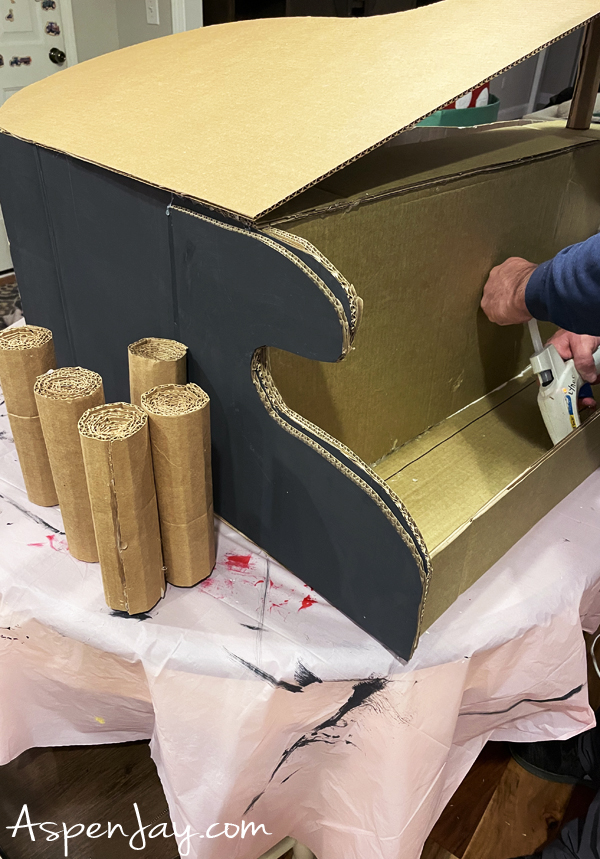
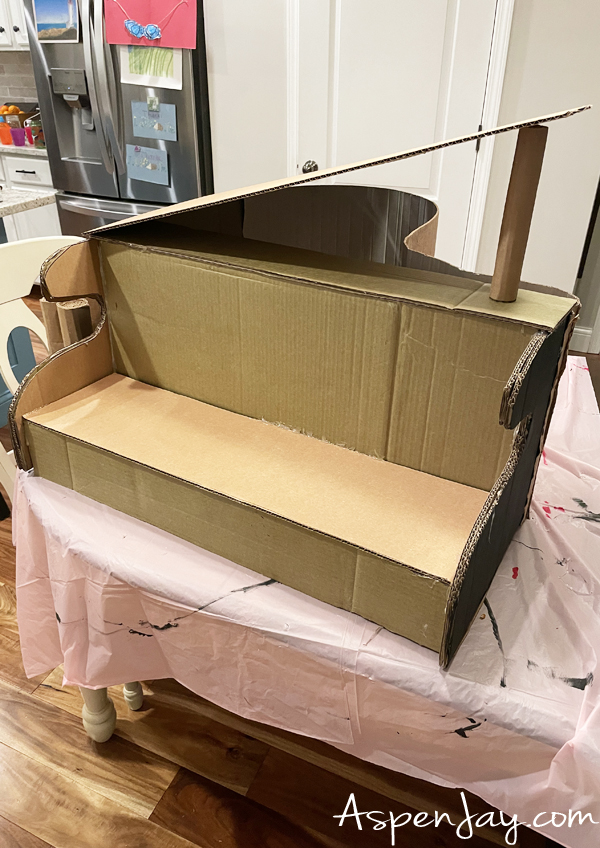
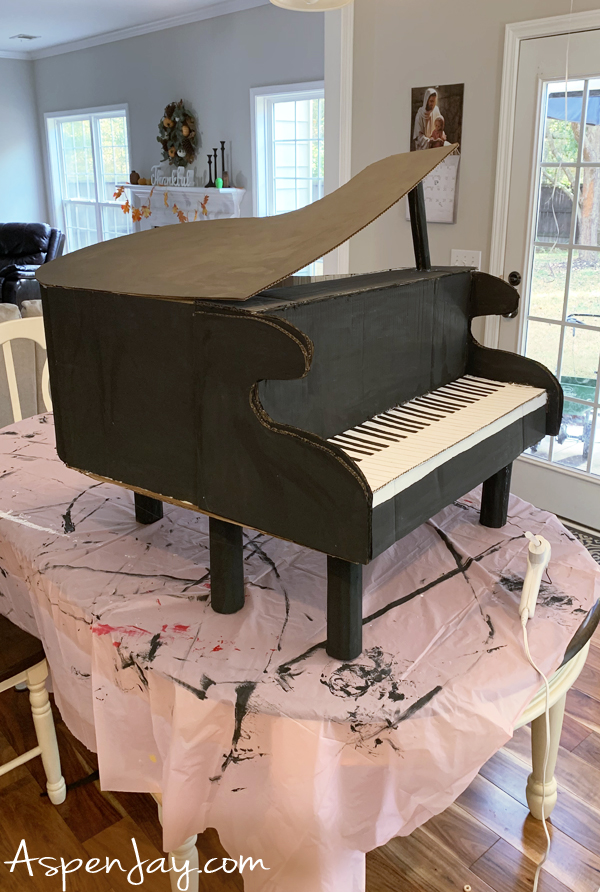
How We Made a Cardboard Piano
Can I just say constructing a baby grand piano requires a bunch of cardboard, a lot of black paint, and a willing partner to figure out how to create it for you!
He actually found a youtube video of how to make one… a mini one that is. He then scaled it up by like 50.
Adding Bowser’s Loyal Advisor Kamek
“Sire, look in the mirror. You have nothing to worry about.” -Kamek
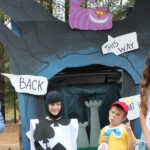
Of course, we couldn’t have Bowser’s Castle scene without Kamek. In the Super Mario movie, Kamek is Bowser’s right-hand man, the second-in-command of the Koopa Army, and his loyal advisor. Since we didn’t have another child to play the part, I knew I couldn’t just leave him out. I made sure Kamek had a presence in our trunk by drawing him out myself. Very similar to how I created the Cheshire Cat for our Alice in Wonderland trunk a few years back.
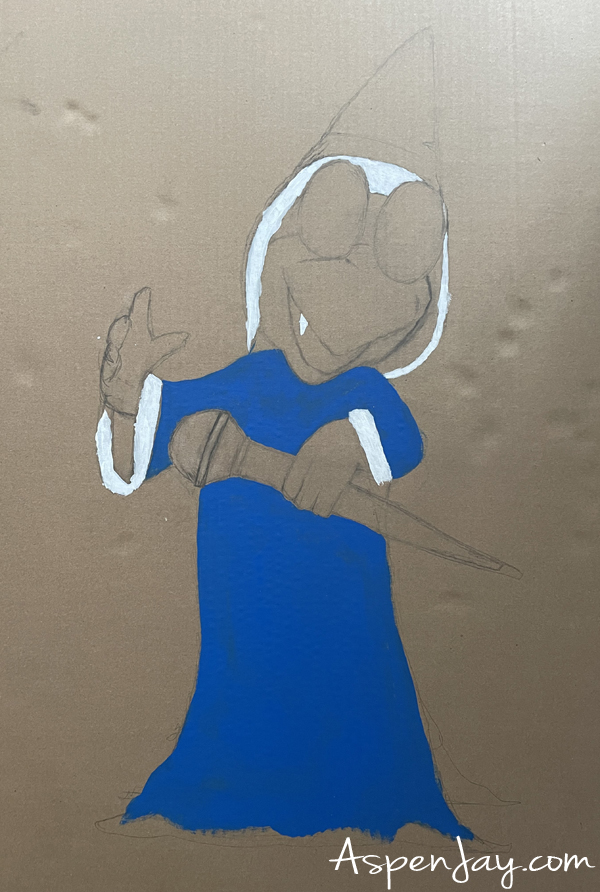
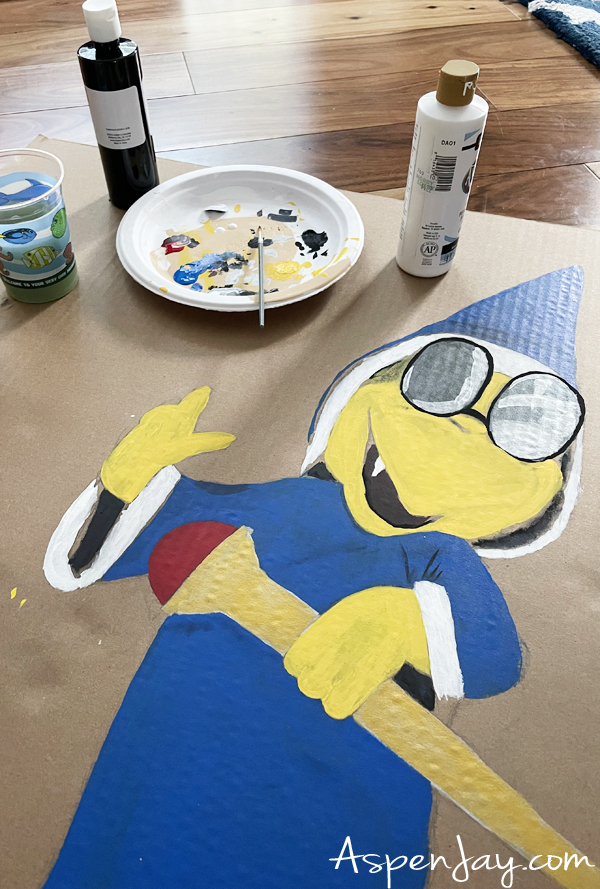
And what do you guess I used to draw him out on? Cardboard, of course! I first sketched Kamek out in pencil, painted him in with color, added a little shading and bold black outlines to make him pop. After he was finished, I then carefully cut him out with an X-Acto knife. I left a little extra cardboard at the bottom that could be folded under to help prop him up for display inside the trunk.
You could easily do the same by printing out a character image and mounting it to cardboard or foam board. It was such a fun detail, and honestly, it tied everything together by making Bowser’s lair feel complete. The children knew who he was right away, which definitely made all the effort worth it!
DIY Super Mario Trunk-or-Treat Props
While my husband was busy constructing the main structure of Bowser’s Castle, I decided it would be fun to make a few Super Mario character props to decorate the outside of our trunk. After all, I had already claimed our kitchen island as my Super Mario costume-making station for the past few weeks. So why not pile on some props too?!
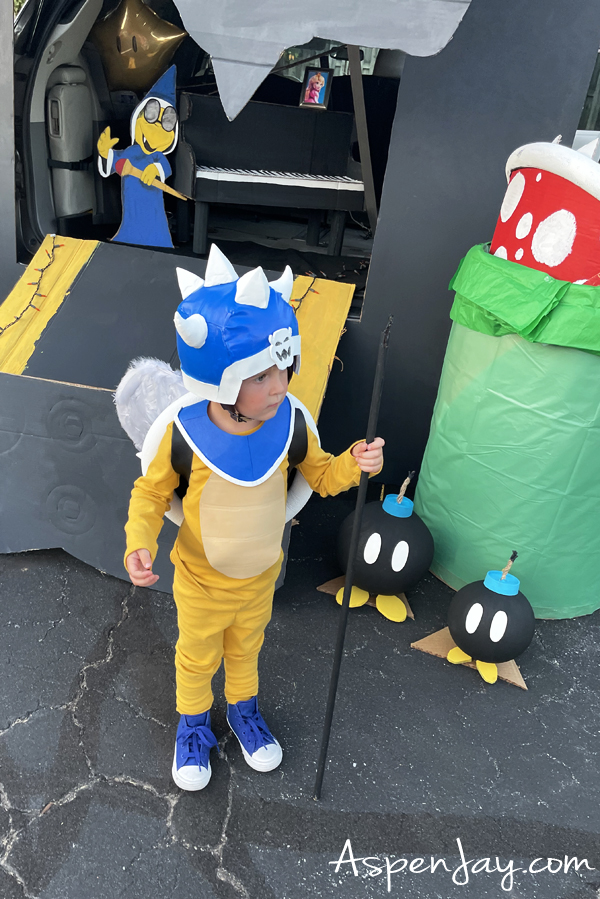
I decided to tackle creating a few classics: Goombas, Bob-ombs, and the notorious Piranha Plants. These familiar faces helped make the setup instantly recognizable, even for folks who hadn’t seen the new Super Mario movie. One glance at the characters, and everyone knew exactly what our Halloween trunk theme was!
DIY Goombas for our Super Mario Trunk
The King of the Koopas needs his loyal band of minions, so I decided to create a few Goombas to join the scene. I had so much fun making them, and they turned out even better than I imagined! Their presence added another playful element to our Super Mario trunk.
Supplies Needed:
- Large bowl – trick or treat bowls worked great!
- Paper plate
- Brown acrylic paint
- White acrylic paint
- Black acrylic paint
- Hot glue/super glue
- black self adhesive foam
- Paper ice-cream cups
- Large can
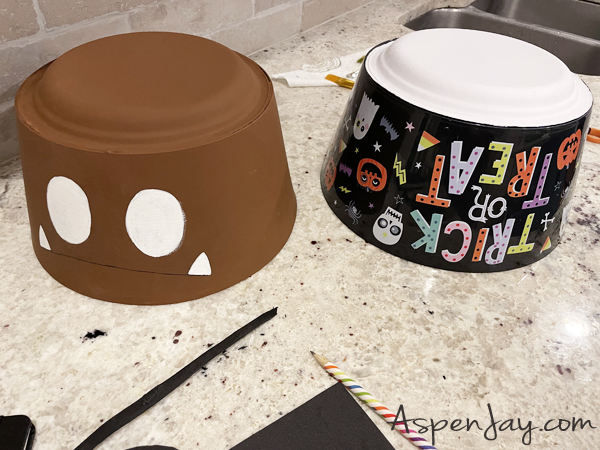

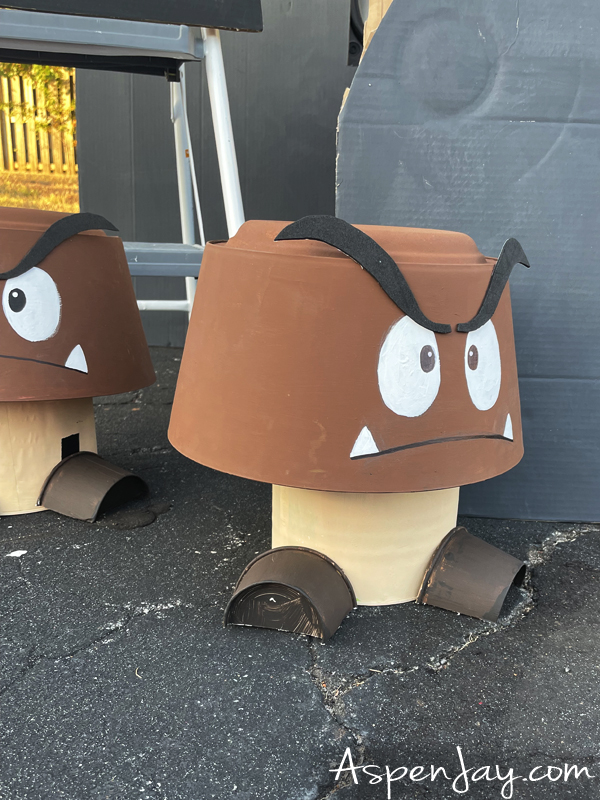
To make the Goombas, I grabbed two trick-or-treat bowls (cheap ones from Walmart or the Dollar Store) and turned them upside down. Luckily, I had paper plates that fit perfectly on top. Seriously, it was like they were made for this project! I super-glued the plates onto the bowls and painted the entire thing brown. Next, I added the Goombas’ signature features: painted two large white circles for the eyes, a simple frown of a mouth, and their classic two teeth. For the eyebrows, I wanted a bit of a 3D effect, so I cut small pieces of black foam and attached them to the bowls.
To give the Goombas some extra height, I repurposed a few food storage cans (still full, of course!), painted them tan, and simply rested the bowls on top. I made the their feet by painting a paper ice-cream bowl, cutting it in half, and attaching it to the foot storage cans. The DIY Goombas definitely added some dimension and personality to our Bowser’s Castle trunk display.
Create it yourself:


Framing Bowser’s Castle with Iconic Mario Pipes
Pipes are everywhere in the Super Mario world, and the ones with the dreaded Piranha Plants are a classic way for Mario (and friends) to “meet their doom.” I thought they’d be the perfect touch to frame our trunk display, adding a little extra danger and color to the scene. Plus, they gave the kids something fun to spot and interact with as they approached Bowser’s Castle!
Supplies Needed:
- Cardboard
- Red acrylic paint
- White acrylic paint
- Green plastic tablecloth
- Green tissue paper
- Pool noodle
- Hot glue
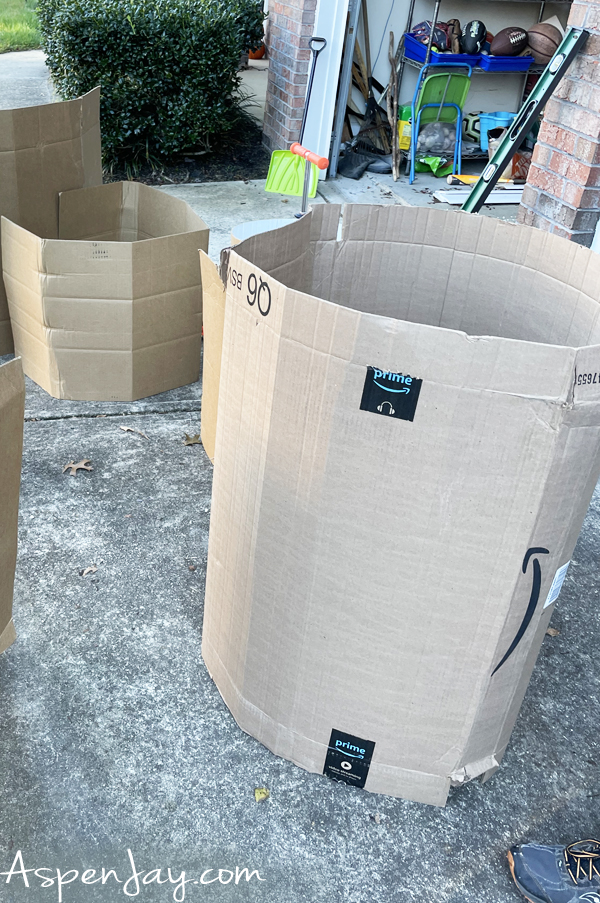
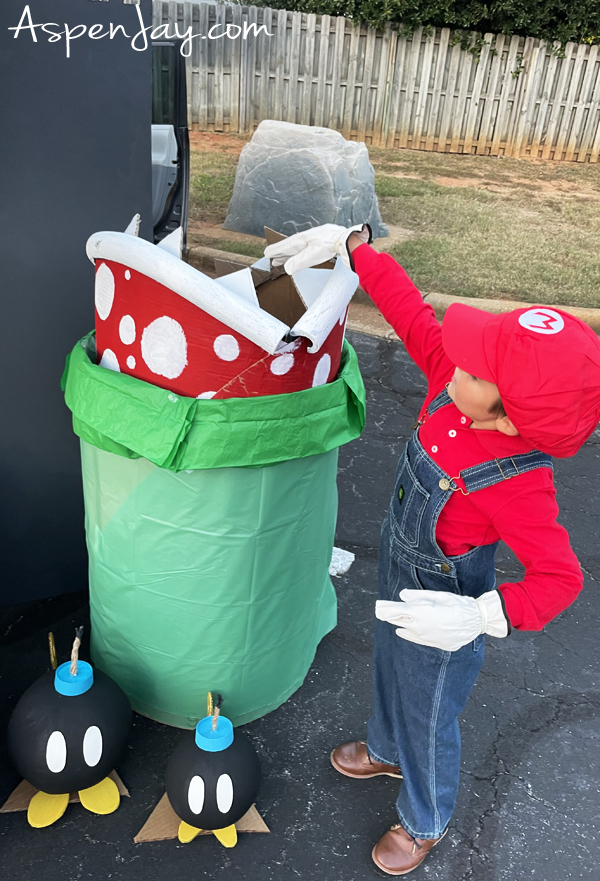
We started with a large piece of cardboard, shaped into a cylinder to form the pipe. Painting it green would have been an option, but with limited time and supplies, we decided to cover the cardboard with a green plastic tablecloth instead. To mimic the thicker lip at the top of the pipe, I folded over some green tissue paper for added detail.
For the Piranha Plants, my husband cut two circular pieces of cardboard. He twisted them together to form the flower opening and then painted them red. The lips were made from pool noodles that we painted white and we added cardboard triangles also painted white for the sharp, iconic teeth. This one didn’t exactly measure up to my expectations, but it was definitely recognizable so I still call it a win!
Create it Yourself!


DIY Bob-ombs for Our Super Mario Trunk
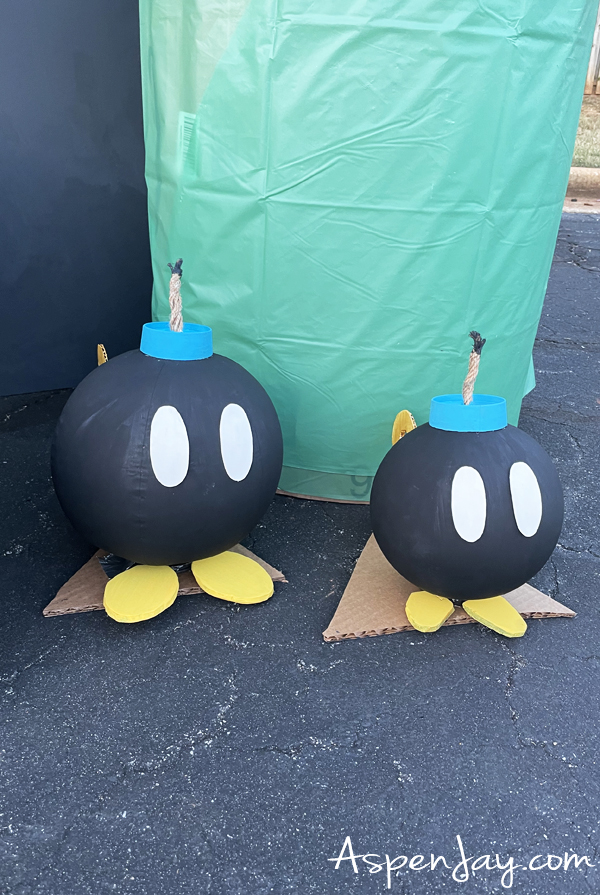
By this point, I was in full-on creation mode and wanted to add more of Bowser’s minions to the mix. So I decided to create a few Bob-ombs to sit outside his castle.
Supplies Needed:
- Small beach ball
- Black acrylic paint
- Blue acrylic paint
- Yellow acrylic paint
- Paper ice-cream cups
- White self adhesive foam
- Jute Twine
- Gorilla Super Glue Gel
- foam
- cardboard
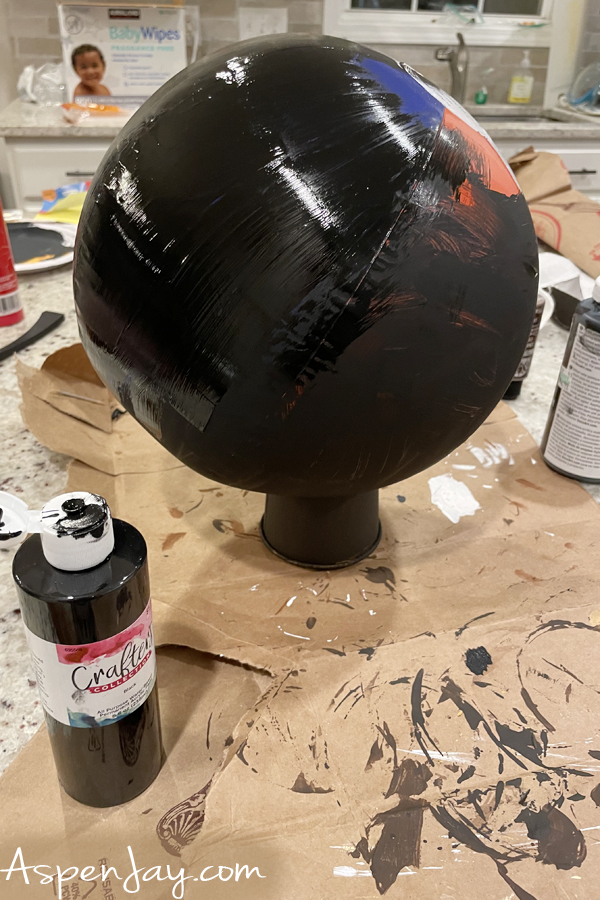

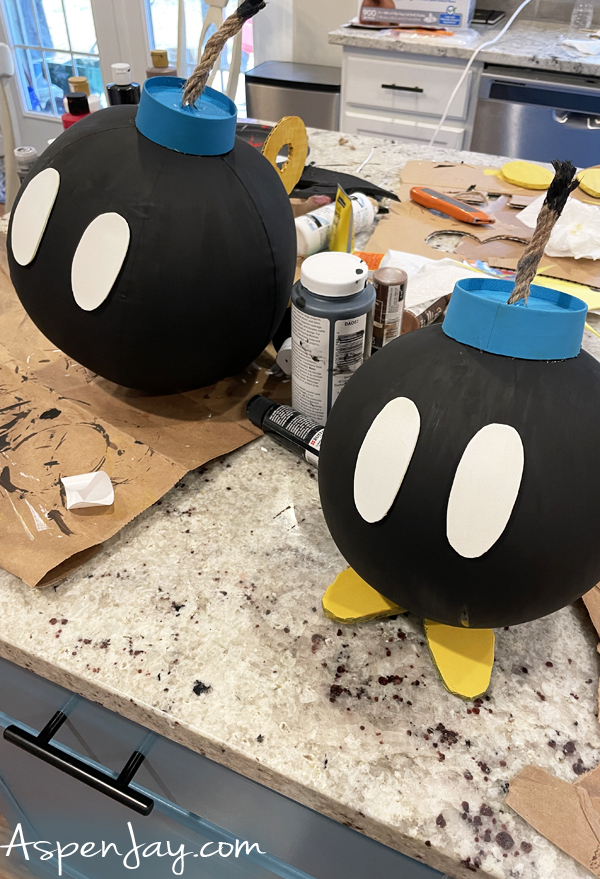
The little Bob-ombs turned out absolutely adorable! Who would have thought something so “dangerous” could be this cute? And the best part—they were surprisingly easy to make. I started by using two smaller beach balls we had on hand and painted them black for the body. For the top, I cut the lid off a paper ice cream cup, painted it blue, and made a hole in the center to insert the fuse. The fuse itself was made by twisting together some brown jute twine and painting the top black. I secured the blue top to the Bob-omb body with super glue.
The innocent-looking eyes were made from two pieces of white foam stickers, which stuck perfectly to the body. For the wind-up key in the back, I cut the shape from cardboard and painted it a yellowish gold to mimic the classic look.
For the feet, I cut out thick foam we had leftover from the Bowser shell and painted them yellow (cardboard could work too!). Because the Bob-ombs were a little top-heavy, I attached the feet to a triangular piece of cardboard, giving them a larger base for stability. The result was an instantly identifiable Super Mario character that added another fun touch to our Super Mario trunk display.
Create it yourself!


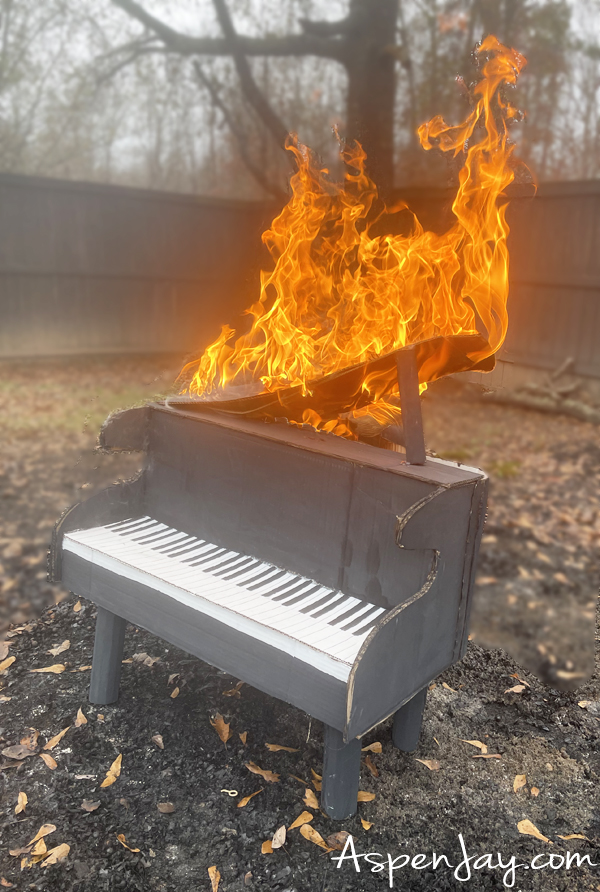
Sadly, we didn’t have enough room in our house to store our piano, so we gave it a proper dramatic ending.
Hope You Enjoyed Our Super Mario Trunk of Bowser’s Castle!
Putting together our Super Mario Trunk-or-Treat display was quite the undertaking but a lot of fun! From Bowser’s castle itself to all the little character props, every piece helped bring the world of Mario to life. The best part? Watching kids (and plenty of adults!) light up the second they spotted the Super Mario Bro. characters. It made all the hours of cutting, painting, and gluing totally worth it. This one will definitely go down as a family favorite! Now the big question is… what theme should we tackle next year?
Did you find this post helpful? Then be sure to save a PIN to your Halloween ideas board! It seriously helps out the blog a ton! Thanks!


Leave a Reply