How to Easily Start a Blog, with lots of pictures to take you through the ENTIRE process! This post may contain affiliate links from resources I use and recommend. You will not be charged any extra, I just receive a small commission if you decide to purchase.

So you want to start a blog, huh?
Actually you’ve been hemming and hawing about creating one for awhile but you just didn’t know where to start. Perhaps the technical side intimidated you…
Never fear, I am here to help you!
Or perhaps, you believe you MUST have a niche before you even consider blogging. All I can say to that is NONSENSE!!!
Having a niche definitely has it’s advantages but it is NOT necessary to start a blog.
Take me for example. I wanted to start a blog way back in 2009 but my ideas for posts were all over the place. A year later, I signed up as a food storage consultant only so that I would have a set topic for a blog: writing recipes using food storage.
I wasn’t consistent in blogging because I didn’t love my niche and I felt confined to just it (sharing our Roaring 1920’s party just didn’t seem right on a blog called “Food Storage Bistro”). I wanted to create another blog but was hung up on the whole “You must have a niche!” mindset.
After receiving some encouraging words from a blogger a few years later that told me what I am telling you now, I took the plunge and created this blog. I began writing whatever was of interest to me and over time my niche began to develop.
Sooooooo all that being said…
JUST START A BLOG! Your niche will come in time.
Now that we’ve thrown out all your excuses… let’s set up YOUR blog!
How to Start a Blog in 4 Steps
- Pick your Domain
- Purchase Hosting
- Install WordPress
- Choose a Theme
Step#1: Pick your Domain
The domain is your blog’s/webpage’s name (this blog’s domain name is https://aspenjay.com). It’s your little space of ‘virtual real estate’. You will want to spend some time brainstorming a name that is a good fit for your blog, is not too long, and is memorable.
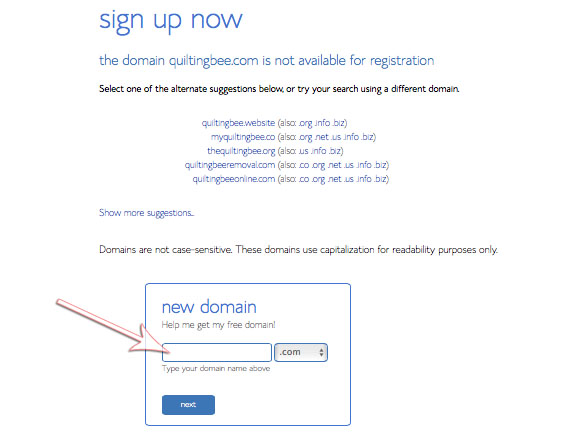
What if the domain name you have your heart set on is already taken? You could try adding extra word before or after it. For example, if http://quiltingbee.com is already taken try adding ‘the’ or ‘a’ at the beginning of the name or adding ‘blog’ at the end, ie http://quiltingbeeblog.com.
Always go for the “.com” address if you can and avoid hyphens, periods, and underscores, which can be confusing for people when they type in your blog’s url.
After you decide on a name, you will need to make sure it is not already taken and then register it (we will take care of that in the next step).
Step#2: Purchase Hosting
A web host is a company that stores your blog’s content and places it up on the internet. You have to have hosting to have your own domain and it’s important to choose a good host, otherwise you will have problems with your blog like slow loading pages and such. I recommend Bluehost. Their customer service is great and my site hasn’t had any problems.
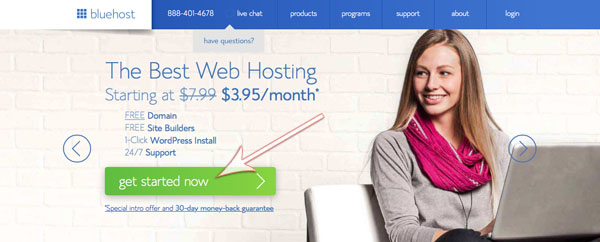
1) Go to Bluehost.com and click the green “get started now” button.
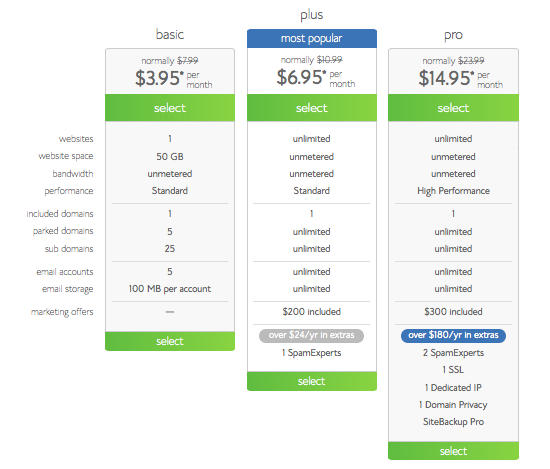
2) Select your plan. The basic plan is perfect starting point.
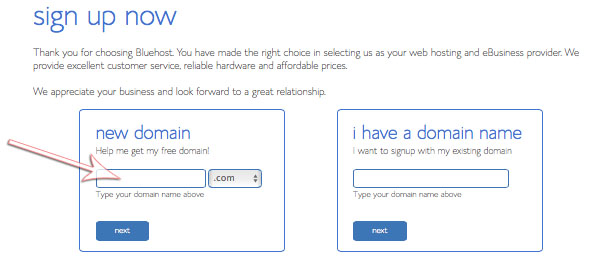
3) Type in the domain name you want in the “new domain” box to see if it is available and then click “next”. The “I have a domain name” box is only if you have previously purchased a domain from somewhere else.
*If the domain you choose is already taken, this window will appear. You can choose one of their suggested names or type in your own.
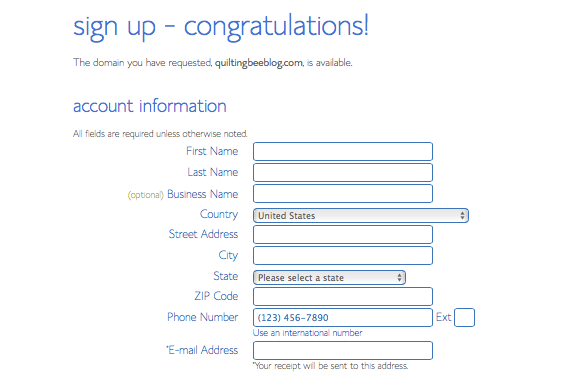
4) Enter your account information.
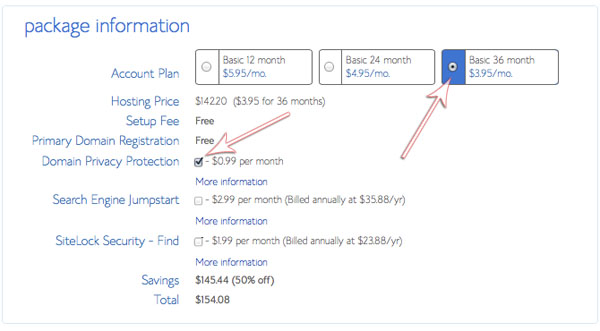
5) Choose your package options. I usually get the 36 month plan because it’s cheapest. Just a heads up, if you do decide to go with that plan, they will bill you for all months upfront. If you find that blogging just ain’t your thing, Bluehost has a 30-day money back guarantee. As far as the other services on the page, I leave them all unchecked except for the “Domain Privacy Protection”. If you decide later on you want them, you can always add them on.
6) Fill in your billing information, check the “I confirm I have read…” box and click on the “submit” button.
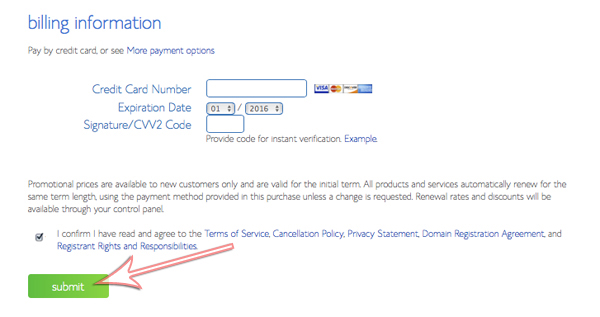
7) The next page will ask you if you want any upgrades, but I would skip these (you can add them later if you want).
After your purchase is complete (CONGRATS you have hosting! 🙂 ), you will be asked to create a password to login to Bluehost and you will receive a confirmation email from Bluehost along with your cpanel information.
Half way through!!! We are ready for WordPress!
Step#3: Install WordPress
Now that you have hosting, you now need a blogging platform. WordPress is web software that allows you to easily create a website and publish posts without needing to know all the computer programming that goes behind it. Installing wordpress is free and with Bluehost, it is done with a few button clicks.
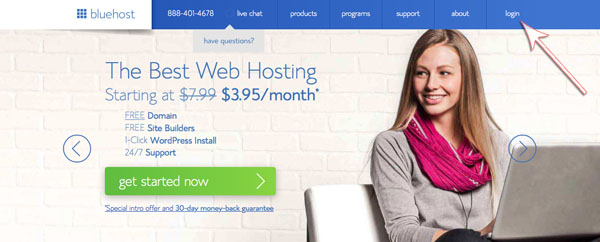
1) Go to Bluehost and click on the “login” button.
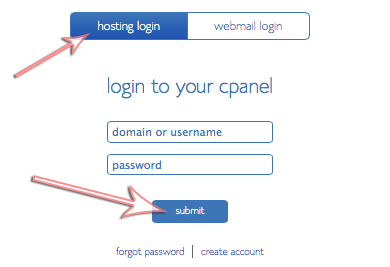
2) Make sure the “hosting login” is selected and type in the cpanel information your received in the confirmation email. A popup window will then ask if you would like help getting started, but you can click out of that, because I’ll be here helping you through the process.
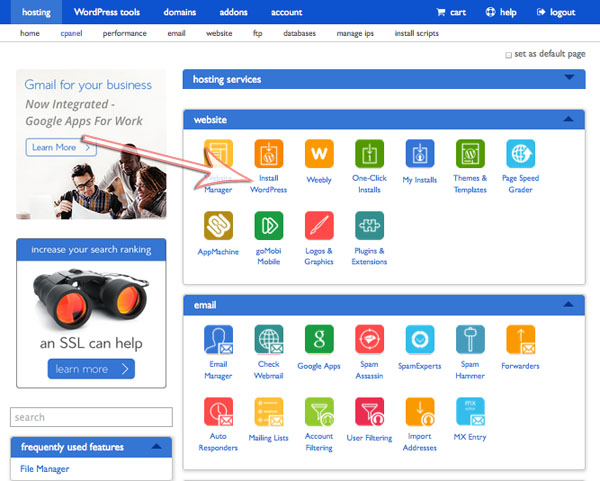
3) Once you are on your account dashboard, click “Install WordPress” which is located under the “website” section.
4) On the next page, click the “Install” button. Doing it yourself is free so don’t worry about the prices they have below, that’s if they set WordPress up for you.

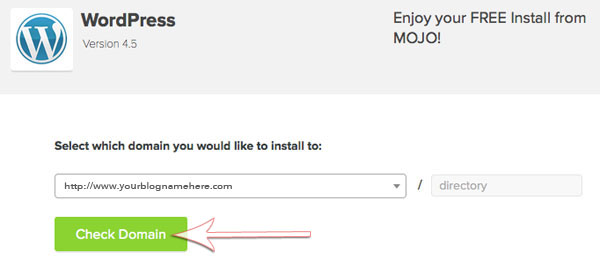
5) As long as your domain is listed, you can go ahead and click on the “Check Domain” button.
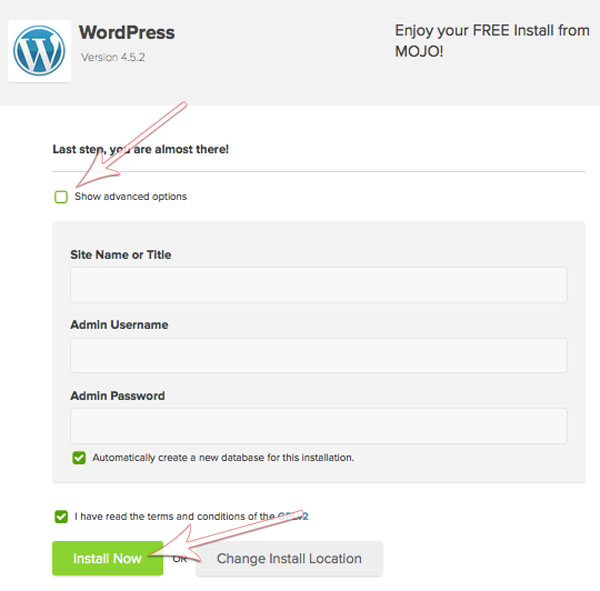
6) On the next window, check the “show advance options” box and fill in the information. Make sure “Automatically create a new database for this installation” and “I have read the…” boxes are both checked and then click on the “Install Now” button.
7) After WordPress has installed, you will receive an email from Mojo Marketplace with important information about your account. It will have your website URL, your WordPress admin login URL, and your WordPress login username.
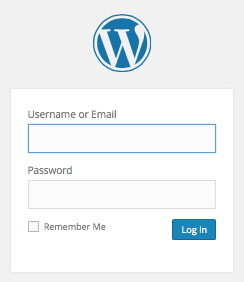
To log into your site go to:
http://yourdomain.com/wp-admin
Replacing “yourdomain.com” with your new domain. For example, mine is https://aspenjay.com/wp-admin and type in your username and password that you received in the email from Mojo Marketplace.
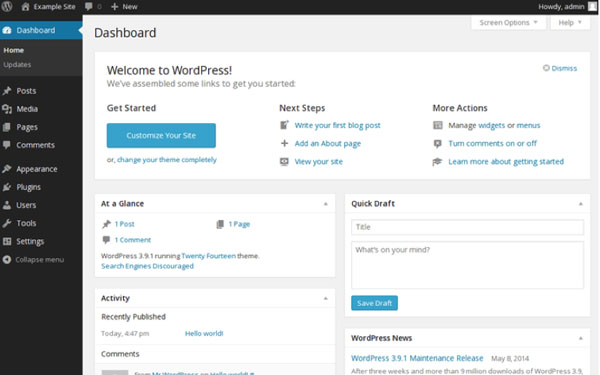
8) Welcome to your website dashboard which you will be seeing quite a lot. Peruse your way around and don’t worry if this is a little overwhelming at first, I promise you will get the hang of it in no time.
DO A HAPPY DANCE!
You finished the mundane work of starting a blog! Now it is time to design your blog!
Step#4: Choose a Theme
Your blog is up and running, yet very basic looking. You will want to customize your site by choosing a theme that you fancy. The theme is the layout or the overall look of your blog. The fonts, colors, placement of the navigation bar is determined by your theme (with some customization leeway).
WordPress has thousands of themes and plugins (the added accessories and customization) to choose from. You can start off with a free theme or jump right into a premium theme. A premium theme allows for more customization and support while the free theme may not be updated as much and is limited in customization (unless you know a little coding). Free themes work great starting off, just be sure to do a little research on the theme by checking the ratings and feedback.
To browse the themes available on WordPress, log into your WordPress dashboard and navigate to Appearance -> Themes and search through until you find one you love.
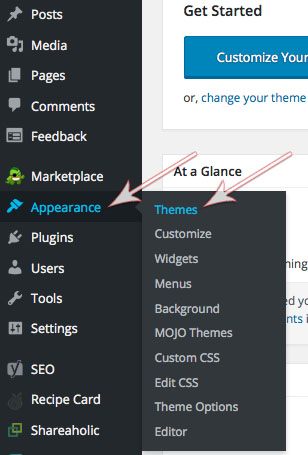
Congrats! You have YOUR very own blog!
You have successfully created your own little personal space on the internet to share whatever your heart fancies. Well done my new blogging friend! By all means, if you have questions or issues setting up your blog please leave a comment below.
Happy blogging! 😀
For more helpful blogging information, be sure to check out the Blogging Resources I use.
While we are on the topic of blogging, you will want to read this post: 5 Simple blog basics.
